Recent Articles
-
Christmas Sword Buying Guide 2025
Dec 03, 25 10:53 PM
How to do a Battle Wrap - Katatemaki Tutorial

If you are tired of the 'standard' (hinerimaki) way of wrapping a Katana, or looking for a slightly easier, less time consuming method - a Katatemaki ito wrap (battle wrap) may be just what the doctor ordered.
So here's an easy to follow step by step tutorial by SBG forum member, Katana Hunter showing how he does it.
Battlewrap Tutorial
Well, I've got nothing to do so I decided to fiddle around with my Masahiro's tsuka and might as well practice tsukamaki. I have this "ito" that looks a lot like shoelace.
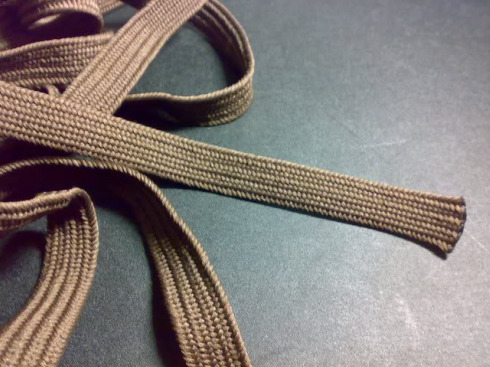
But since I don't have any real ito around, I decided to use this instead.
I'm not sure what this "ito" is made of, so I did a burn test and the results were:
Flame: melts and no flame (but after a while, it catches fire and the flame color is yellow)
Odor: Smells like burnt rubber
Residue: bard bead
Checking Thomas Buck's guide, I don't see any burnt rubber in any of the fabrics mentioned there. Or maybe the odor I smelled could be like celery since I'm not familiar with the smell of celery. Anyway, let's just classify this ito to be nylon and let's get on with the tsukamaki.
Here are the 'before' pictures of my Masahiro's tsuka.


As you can see, the original wrap is ugly. Uneven diamonds. Tsukamaki started on the wrong side. Direction of the crossovers (X) do not alternate. Fuzzy and worn out cotton ito.
Here's a picture of the tsuka core and its original fittings.
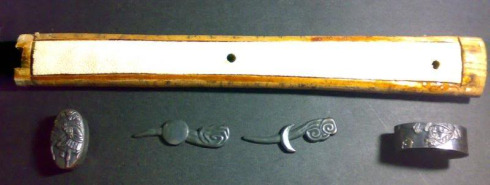
I had to remove the adhesive on the side of the tsuka. Otherwise, the ito would stick to the tsuka and I'll have a hard time stretching. I also did a little brushing to clean the samekawa with some soap and water.
I was planning on doing a katatsumamimaki. It's like a morotumamimaki (most commonly known as tsumamimaki), except the ito underneath is folded and the one on top is pinched. Whereas with tsumamimaki, both strands are pinched. Anyway, I really had a hard time doing katatsumamimaki... I can't get to produce even diamonds, and often reveals part of the wood. Maybe because the nylon ito stretches so much compared to silk or cotton. So I decided to just go with hinerimaki (most common type of wrap).
I also had a hard time doing hinerimaki with this type of ito because it stretches so much, it was really hard making even diamonds... Another thing that gave me a problem was the placement of the 1st mekugi-ana (later shown in the picture). So I decided, I'll just do a katatemaki since I'll be making less diamonds and I've been wanting to learn how to do this wrap. I checked on Thomas Buck's guide again. Studied pictures of tsukas wrapped in katatemaki, then I thought I'm ready to do this.
Here are the 'after' pictures of my Masahiro's tsuka - my 1st ever try on katatemaki:
Omote side

Ura side

Yeah, I know... it's a crappy katatemaki! LOL! The diamonds are not uniform in size... Hishigami sticking out...
As you can see, I still haven't cut off the ends so I can still re-do the wrap now that I've learned how to connect the hinerimaki from katatemaki. In the picture showing the ura side, you'll see the placement of the mekugi-ana. It's off-centered. This was because the original wrap was started on the ura side and not on the omote side. That gave me a hard time. I was thinking, how am I able to make an even diamond if the mekugi is on the way of the crossover? But I still decided to go ahead with the wrap and see how it would look like.
*Update*
Now that I've learned how to do this... I decided to try it out again and see if I can do a better wrap despite of the bad material I have. While re-wrapping, I took more pictures of the steps that I can share to those who want to try this style of wrapping since I find this to be the easiest because there'll be less diamonds.
Okay... let's get on with the re-wrap!
Prepare the ito where the other half is shorter.
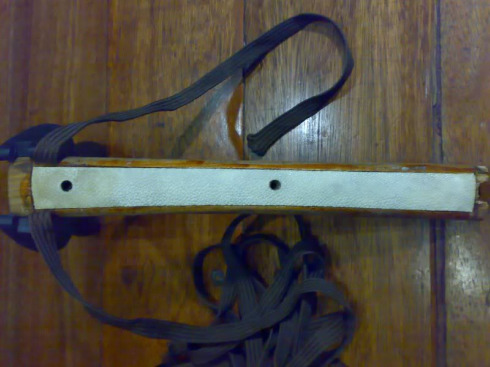
Started off with hinerimaki... then after the third diamond, cut the shorter end of the ito and proceed to katatemaki.
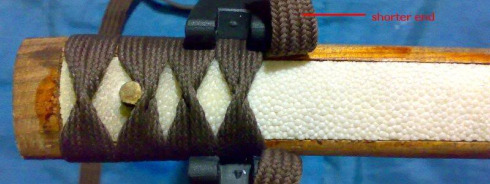
Take the shorter end and position it (diagonally) on the tsuka in a way it will form a diamond with the other end.
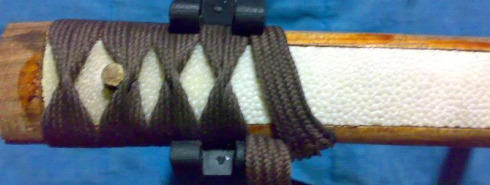
Take the longer end and overlap the shorter end to form a diamond.
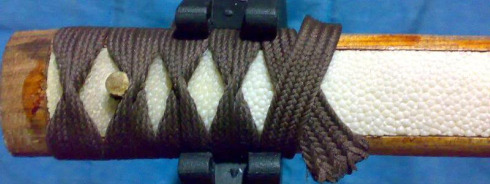
Be sure to stretch the ito tightly.
Take the longer end and wrap it vertically over at the omote side... like so:
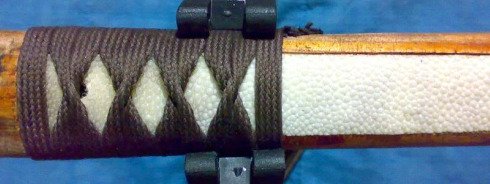
Take the longer end over at the ura side and just follow the first wrap you made.
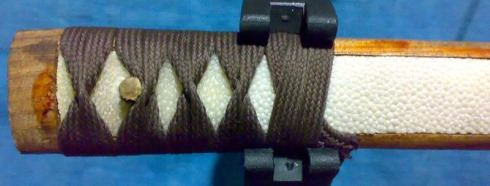
Just a review, here's Thomas Buck's diagram:
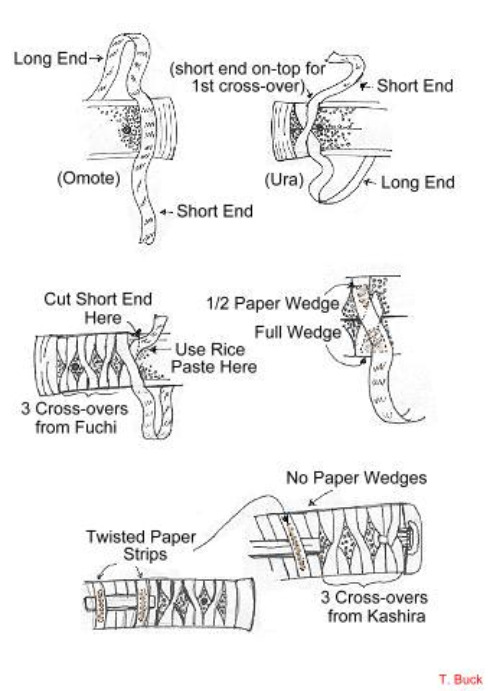
Moving on... just wrap the ito around and around the tsuka. I'm not sure about the placement of the menuki if its correct, but that is where I wanted them.
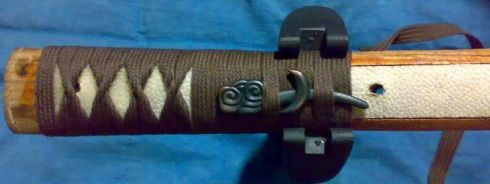
Then when you reach the end of the katatemaki, it's time to insert a new end of ito.
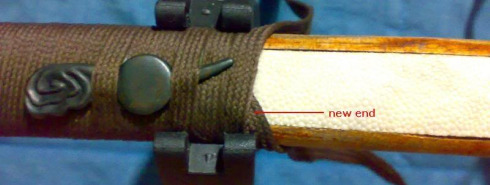
Again, position it in a way it will form a diamond when you start doing hinerimaki again.
This is what the 2 ends of ito looks like over at the omote side where you begin hinerimaki:
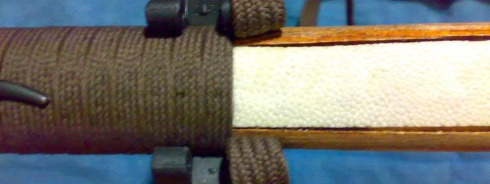
Over at the ura side to start hinerimaki.
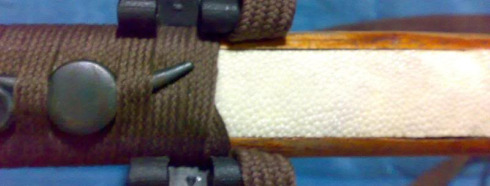
And here's the final wrap, my 2nd try on katatemaki (was there any difference with the first?)
Omote side:

Ura side:

I don't know what happened with my omote and ura side knot... they're on the opposite side. I only noticed it when I finally cut the ends. Maybe this happened when I shortened the tsuka at the kashira end. Well, anyway it's done and I hope it looks better than my first try.
This is by no means a professional guide, I'm just sharing what I learned and will be improving my skills. I hope you have learned something as well.
Regards,
Aldwin
How to Wrap the Menuki
A fellow SBG member was asking on how to wrap the menuki on a katatemaki. So I thought of updating this thread with the technique I use on how I do it.
I got one of my old tsuka lying, excess ito, and spare menuki and did a quick wrap just to show how it's done. I'll let the pictures do the talking.
Again, this is by no means a professional guide. This is just the technique I use and others may have a better way of doing it. Enjoy!
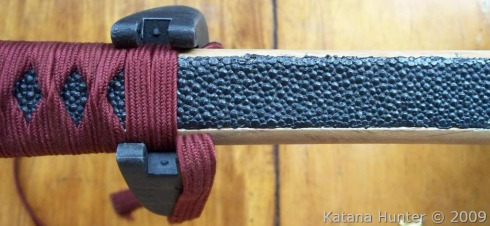
Simply place the menuki where you want it to be. Others want it at the center part of the katatemaki. I prefer it to be at the beginning.
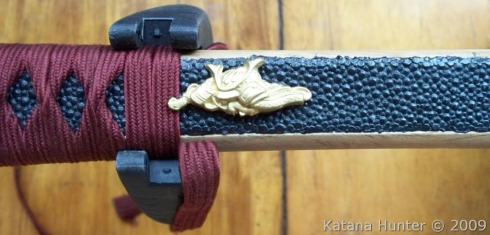
You can choose to cover any part of the menuki. Others prefer to cover the whole first and end part, I prefer to show a little of the 1st and end part of the menuki.
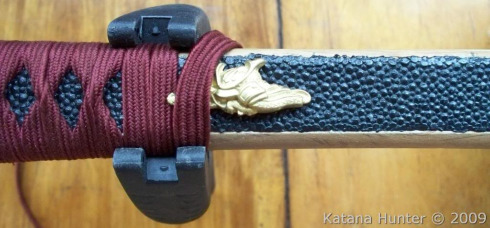
Here, the ito is already holding the menuki in place. It should be stretched very tightly.
Now it's time to tuck the ito underneath the menuki. To do so...
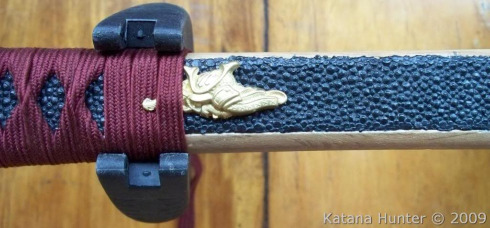
I use a dental pick to slightly lift the menuki. Enough to insert the ito. Don't lift to much or it will loosen the ito holding the menuki.
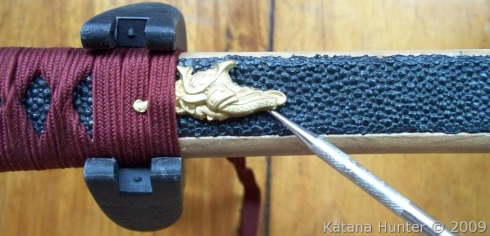
Then carefully insert the ito while taking care not to lift the menuki too much.
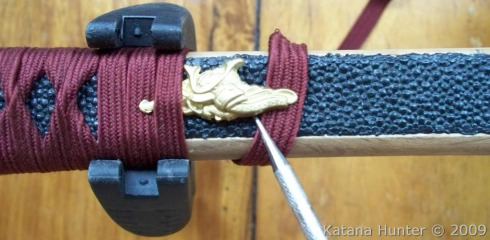
It helps to push the ito with your pick, but be very careful not to fray it.
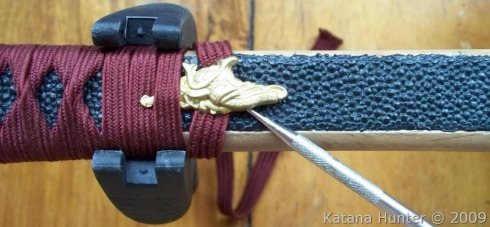
Here you can see the space under the menuki. It would be very easy to insert the ito.

This is the 3rd time the ito is tucked underneath the menuki. And you can see that it should already be on top of the menuki.

Shown on this picture, the ito is already covering the whole end part of the menuki and is not the same on how I started it. I prefer to show a little bit of the first and end part of the menuki.
Moving on to the next picture...

Simply remove the ito underneath and place it on top.

Make sure that the ito holding the end part of the menuki is very, very tight. So tight that you won't be able to move the menuki. Otherwise, you'll have to start again.

This is the tricky part for me. This could be the reason why others prefer to cover the first and whole part of the menuki.
Since the menuki is already being held down tightly by the ito, you need to carefully lift the end part so it will not loosen the wrap.

There you go!

I hope this guide has been useful.
After 1 year and 2 months, the first katatemaki I did has withstand constant usage during iai and kata and is still as tight as when I first wrapped it. I think it even became tighter due to sweat and oil from my hands.

RESOURCES
You can read a lot of information on tsukamaki in general or even commission Dr Thomas Buck to do an ito wrap in any style for you here at Tsukamaki.net
I hope this battle wrap tsukamaki tutorial has been helpful. To return to Free Sword Customization Tutorials from How to do a Battle Wrap Ito for a Katana, click here

Buying Swords Online Can Be DANGEROUS!
Find the Best Swords in the:
Popular & Recommended ARTICLES

The ONLY true free online magazine for sword enthusiasts. Delivered once a month on the 1st day of the month, no filler and no BS, just the latest sword news & info delivered straight to your inbox.


